First of all, thanks to everyone who wished me luck with the new job which started today! My first day went really well. Everyone was really friendly and helpful, and they'd got all sorts of stuff prepared for me which I wasn't expecting. And I managed to get started on analysing some Marketing data for them which has been really useful for getting to grips with the kinds of customers we mostly deal with. I'm amazed by how much I remember from my old Quantitative Methods sessions at uni (well not from the lectures, they were less than useless, but the textbook was great!).
Even though it's only a fixed term contract, I'm feeling really positive and excited about this job. From the sounds of things there's going to be a lot of variety in what I do in terms of the Marketing for the book business and I get quite a lot of responsibility for individual projects as well which will be really helpful for learning lots about the industry. Plus I get to use my language skills; one of the first things they asked me to do was translate a couple of sentences they needed for some packaging, which wasn't hard and only took a couple of minutes, but I'm sad and really love translating.
They've also asked me if I want to be involved in some other multilingual tasks in the future (I'm not really sure how much I'm allowed to say, so best be cautious), which is quite exciting and gives me the opportunity to practice my German as well.
Don't mean to gush, but I'm really, really happy I got this opportunity. I've even enjoyed spending time this evening learning about XML for the job - I never would have thought in a million years I'd enjoy learning a computer language, but life's a funny thing!
To celebrate the new start, I decided to crack open a special bar of chocolate I've been saving since Christmas.
As a follow up to my earlier post about the Cooking Challenge 2012, here's a couple of photos of tonight's cooking:
Jamie Oliver's recipe for Crunchy Garlic Chicken which I served with Ravinder Bhogal's recipe for Fattoush and crumbled over with feta cheese:
Chicken fillets, flattened and coated, waiting to go in the oven
Frying the pitta bread for the fattoush
I baked the chicken in the oven at it's highest temp for about 20 minutes (turning every now and then) but just to be sure it was absolutely cooked all the way through, I snipped it into strips and fried it in a tbsp of olive oil for a couple of minutes before serving on top of the fattoush.
Really yummy and easy.... if anyone wants the recipes, let me know!
Hi again,
as I mentioned in my previous post I have some cooking stuff I wanted to write about. Last week I was just enjoying browsing and drooling over a few of my recipe books, and I decided to make a list of a load of recipes I wanted to try. As the list grew and grew and grew, I realised that it might take me a while to get through all of them. In the end I came up with 72 recipes. There's nothing special about the number 72, I just found 72 I liked out of 5 cook books and I thought if I opened anymore books then the list would get ridiculously long.
So as a few of my friends have been doing resolution type things on their blogs, I thought it might be cool if I tried to cook all 72 recipes before the end of 2012 (kind of like the book 'Julia and Julia', although I don't flatter myself that my resulting blog will be half as interesting or witty). I worked out that that would be 1 and a half recipes on average a week, which might seem like quite a lot, but to be fair some of the recipes aren't long complicated recipes, they're just cooking stuff I want to try e.g. Jamie Oliver's Jam Jar Salad Dressings.
Since I haven't gotten round to writing about this until now, I've already completed some of the recipes (the ones I've highlighted), but I'll most likely be doing a few of them a couple of times anyway, so it's no big deal I don't think.
Below is the list of recipes I want to have completed by the end of the year (sorted by book) and here's the stats as they stand:
16. Hanoi poached chicken p. 202
17. Orecchiette with curly kale, lemon, and basil pesto p. 221
18. Butternut Squash, feta, seeds and greens salad p. 225
19. Crispy five spice duck breasts and pak choi p. 276
20. Fragrant chicken curry with star anise and lace pancakes p. 280
29. Lemon syllabub p. 89
30. Creme Caramel p. 90
31. Cranachan trifle p. 102
32. Petits Pots au Chocolat p. 113
33. Very chocolate-y Tiramisu p. 118
34. Salty caramel chocolate sponge p. 124 35. Big apple pie p. 130
36. Baked rhubarb sponge p. 142
37. Lemon surprise pudding p. 156
38. Hot Cross Bun pudding p. 184
Food Lovers: Cupcakes and Bakes
39. Redcurrant and Blueberry Muffins p. 46
40. Apple cakes p. 58
41. Berry cupcakes p. 64
42. Carrot muffins with walnuts p. 90
Jamie's Ministry of Food (Jamie Oliver)
43. Asian Chicken Noodle Broth p. 37
44. Macaroni cauliflower cheese bake p. 49
45. Chicken Chow Mein p. 60
46. Sweet and sour pork stir fry p. 65
47. Beef and black bean sauce p. 69
48. Chicken Korma p. 74
49. Lamb Rogan Josh p. 81
50. Chicken Tikka Masala p. 82
51. Thai Green Curry p. 91
52. Vegetable Bhajis p. 92
53. Jam Jar Dressings p. 102
54. Sweet potato and chorizo soup p. 131
55. Cauliflower cheese soup p. 136
56. Basic stew p. 180
57. Perfect roast chicken p. 196
58. Perfect Roast Lamb p. 200
59. Yorkshire Puddings p. 209
60. Baked creamy leeks p. 219 61. Baked French Potatoes p. 220
62. Crunchy Garlic Chicken p. 241
63. Parmesan chicken breast p. 242
64. Lamb chops and chunky salsa p. 244
65. Morroccan lamb and couscous p. 246 66. Griddled tuna and asparagus p. 261
67. Paella p. 292
68. Granola p. 316
69. Vanilla cheesecake p. 325
70. Fruit scones p. 331
71. Quick steamed microwave puddings p. 333
72. Cookies p. 336
I'll try to post pictures of everything as I cross it off the list (I guess the easiest thing is to just keep editing this post as I go along).
Right better get cracking - that crunchy garlic chicken won't make itself!
Over this week off before starting my new job, I've spent a bit of time indulging my inner child and getting crafty!
You might have seen the little postcard hangings I made for the house a few months ago, but recently I've noticed a few tutorials on the web for how to make infinity scarves (or circle scarves) out of old T-shirts. Since Tom had several bags full of old clothes that we were just going to recycle at the Cash for Clothes place, I decided to see if I could nab any with nice colours that could potentially be made into scarves or other items of clothing. Upcycling is the new recycling!
I followed a few different tutorials that I found on Pinterest, and after a few botched attempts using the wrong kind of shirt (turns out you really need 100% cotton T shirts or the strips won't roll up correctly) I managed to get two acceptable scarves in quite nice colours in next to no time. All you need is a cotton shirt, a pair of scissors, and a surface you can cut on, so there's absolutely no sewing involved!! Remember if they're second hand shirts you probably want to wash them first...
Here's a couple of links to some tutorials I found useful:
And here's some pics of what I managed to make once I got the right material:
This one I made with two different shirts, one that was striped blue and cream, and one that was plain blue. One thing I learned was that when the cotton strips are stretched and roll back on themselves, they more often than not roll inside out so you only see the colour that is on the inside of the T-shirt. So in the case of my blue and cream striped T-shirt the strips came out quite muted (the colour was printed on the outside of the shirt , rather than being dyed all the way through). That's why I added strips from the darker blue T shirt. As I didn't have any T shirts without seams, I had to hide them under wrapping at both ends of the scarf, but if you manage to find a T shirt without seams then you can make more necklace-style scarves (like in the A Pretty Penny blog above).
Here's the finished product!
I also made another scarf out of a striped T shirt in two shades of grey. This was a larger shirt so it turned out longer than the blue scarf.
Again I had to wrap it on both ends to hide the seams. Because this shirt was striped in two shades of grey I thought it might be quite cool to try to cut the strips so they had both shades (rather than being one or the other), so that's why it looks like I've used two different coloured strips on the wrapping.
One thing I found really helpful was hanging the strips across coat hooks to arrange the seams and then to wrap each set of seams in turn, as it keeps the strips from getting tangled. It was also helpful for stretching the cotton strips initially as it's easier to see if they're roughly the right length or not. Plus it's strangely fun hanging off a coat hook...
I also made a loose headband from some strips from the sleeves of the darker blue T shirt. Sorry for the poor quality images!
Really bad image, but it shows the mix of colours in the blue-white scarf quite nicely
Next time I might use strips to plait a headband so it's a bit more substantial. This one is probably just something I'd wear around the house, but you can quite easily make them more stylish to wear out in public!
You could also use the same sleeve strips to make a simple wristband:
That's all on crafty stuff for now, but I have some more cooking-based stuff to write up so I shall be back again very soon!
This was one of the more mammoth baking adventures I undertook last year, so I've needed to psych myself up to write it up. Although the eventual outcome looked and tasted great, the amount of stress it caused and problems I encountered means it belongs in part under the 'Kitchen Disasters' category. This is why you should never fudge recipes people - learn from my mistakes!!
I was cooking this to take to some friends in Droitwich who were holding a New Year's Eve Party which is a good hr and a half away so I needed to make sure the cake was ready to go pretty much as soon as Tom came home from work that evening, so I had some quite specific time constraints.
I think I started baking around 11:30 on New Year's Eve and I think it was just about finished around 6ish (I had the Jessie J album on repeat and I think I listened to it about 4 or 5 times...), but I did have to do a lot of research on the internet and asking people at my local cook shop before attempting this, including what icing would be best to use for sticking the smarties on, how to frost a cake properly, and even how to work out mathematically how many boxes of smarties I'd need to complete the design (I didn't actually work it out for my design, but I did find a cool/geeky website where someone else had done it).
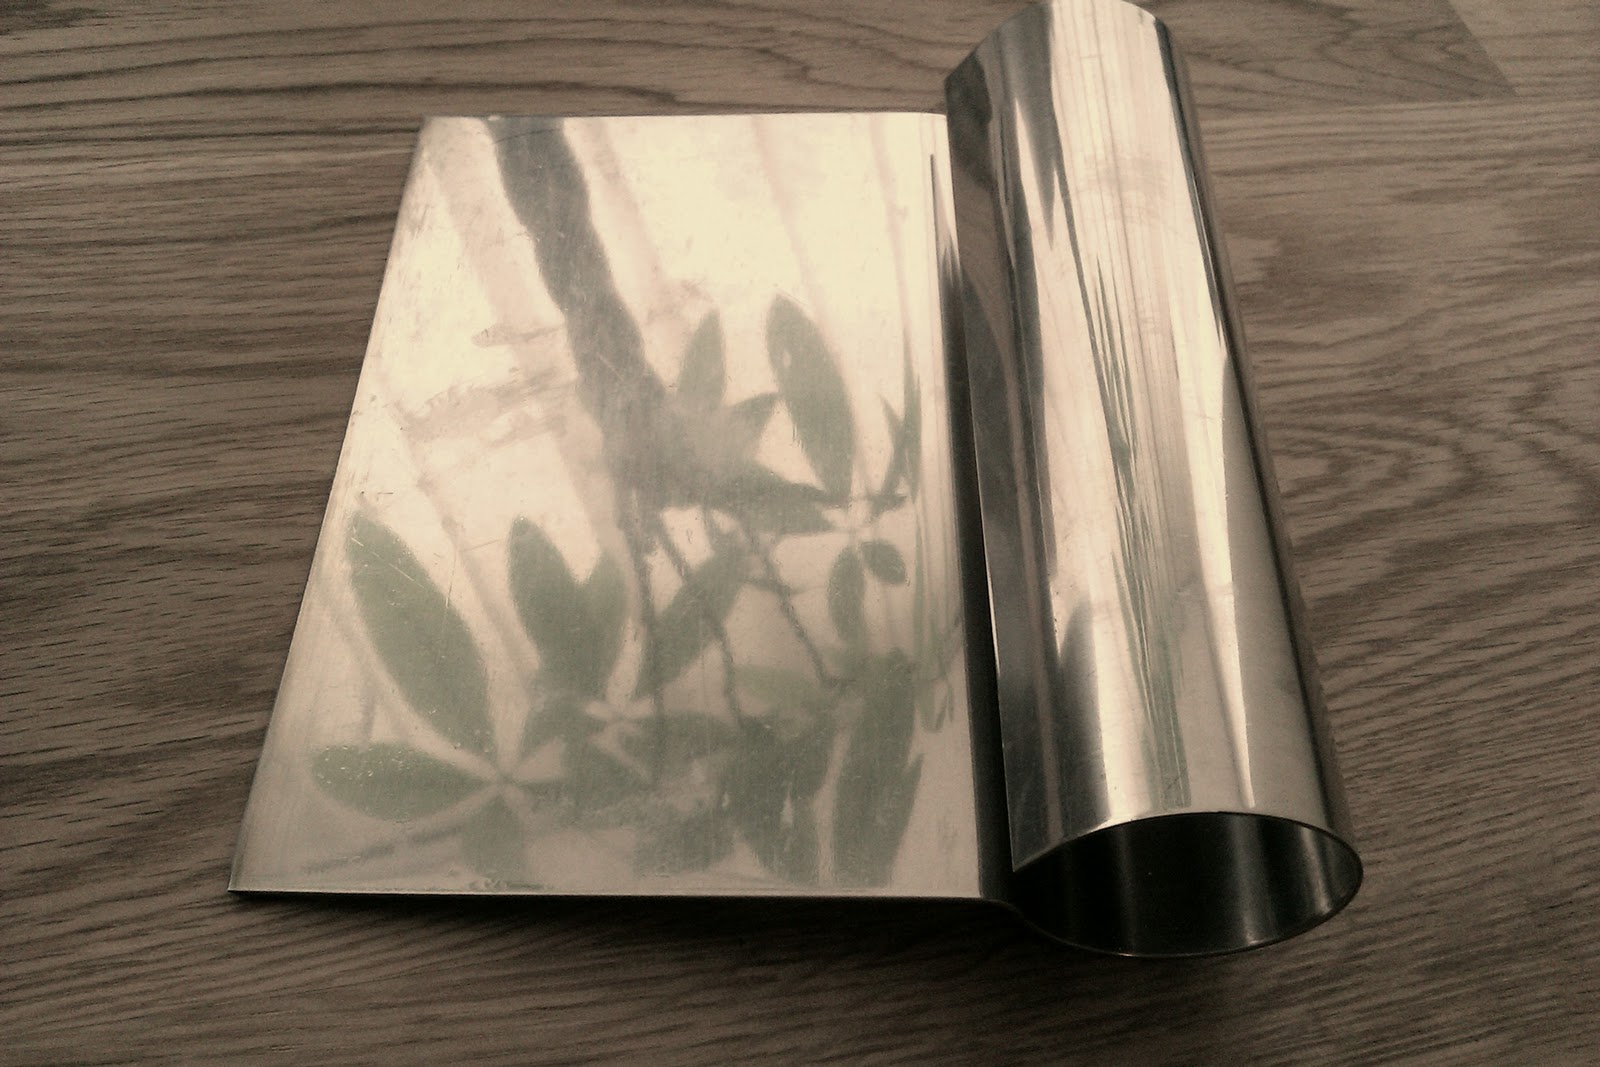
As I knew this one was going to take me a long time and that I'd need a fair bit of work surface, I decided to bring in our fold out metal table from the patio and one of the rather unstable chairs that go with it (this was before Tom got us our nice new dining table and chairs). Having researched the various different techniques required for the decorating part of the recipe I also had to go out and buy a palette knife and a cake scraper from the cook shop (again I can't believe how expensive this stuff can be). If you've not used/come across a cake scraper before, they look like this (featuring a reflection of my Pachira plant Roberto. And no, I don't think it's weird that I named my plant):
Why take a normal picture if you can take an arty-farty one?
Anyway, enough chit-chat, on to the recipe! The basis for the cake itself was the Hairy Bikers Chocolate Cake but I used rhubarb jam instead of strawberry, and I decorated it with White Chocolate Buttercream, the recipe for which came from another BBC Food recipe from The Great British Wedding Cake series.
I also followed a video tutorial from the BBC Food website to help with the icing technique as this has always been my downfall in the past: Icing a cake with buttercream (video) Ingredients: Chocolate sponge cake
250g butter, softened (plus extra for greasing)
400g golden caster sugar
3 tbsp sunflower oil
1 tbs vanilla extract
3 free-range eggs, beaten
400g plain flour
1 tsp bicarbonate of soda
2 tsp baking powder
1/2 tsp salt
pinch cinnamon
85g cocoa powder
220ml flat cola
150g strawberry jam (the stuff I used was more like a jelly, what you really need is something a bit runnier that will spread easily)
150ml double cream, whipped to stiff peaks
White Chocolate Buttercream
As I was only going to be decorating the one cake and not a whole wedding cake I adapted the ingredients for the buttercream to the following:
200g unsalted butter
1 tsp vanilla extract
500g icing sugar
100g white chocolate, melted
Decoration
Lots and lots and lots of Smarties. What I really wanted was a couple of those giant tubes you used to see at Christmas but I couldn't find them anywhere! Instead I had to buy about 25 of the smaller hexagonal cardboard tubes from Sainbury's and the Co-Op which ended up costing me a ridiculous amount of money. Curses...
Method
1. Preheat the oven to 170C/325F/Gas 3.
2. Grease a 25cm/10in cake tin (I only had a 20cm tin and couldn't find any bigger ones in town. See problem no.1 below) with butter and line with greaseproof paper.
A neat trick for lining round cake tins with greaseproof paper can be found here:
3. For the chocolate cake, in a large bowl, cream the butter and sugar together until the mixture is pale and light.
4. In a separate bowl, stir the sunflower oil and vanilla extract into the beaten eggs.
5. Gradually beat the egg mixture into the butter and sugar mixture, adding just a little egg mixture at a time and making sure it is well incorporated before adding more, until all of the egg mixture has been incorporated and the mixture is well combined. If the mixture looks like it's starting to curdle with the addition of the egg mixture then you can add a bit of flour to prevent this.
6. In a separate bowl, mix together the flour, bicarbonate of soda, baking powder, salt, cinnamon and cocoa powder until well combined. Mmmm, cocoa and cinnamon... :)
7. Gradually fold the flour mixture into to the cake batter mixture, a spoonful at a time, until all of the flour mixture has been incorporated into the cake batter. This might take a while as there are quite a lot of dry ingredients, but go slowly and your cake will be better for it!
8. Gradually add the flat cola to the cake batter and stir carefully until well combined. I definitely find it goes in better if you add it bit by bit, as with the egg mixture.
NB: If you only have fizzy coke, you can make it flat either by shaking it up inside the bottle and carefully opening the lid just a crack to let the gas escape (you might want to do this over a sink if you don't want coke all over yourself and the kitchen!). Or you can pour out the amount of coke you need into a measuring jug, add a small teaspoon of sugar, and stir. This will make the coke fizz up and release loads of the gas. Taste, and if it's flat enough then great, but if not, add a tiny bit more sugar and stir again to release the left over gas. This will make the coca cola (and therefore your cake mixture) a bit sweeter, but it's a lot less messy than shaking up the bottle!
9. Pour the cake batter into the greased, lined cake tin. Level the top of the cake out with a palette knife or spatula.
10. Transfer the cake to the oven and bake for 1hr 15 mins to 1hr 20 mins, checking regularly, or until the cake has risen and a skewer comes out clean when inserted into the centre of the cake. (If the top of the cake browns too quickly during cooking, cover it with a sheet of aluminium foil.). This is where we encountered
Problèmenuméro un....
Problem no.1
One of the first problems I encountered was, once again, down to incorrect equipment. The original recipe called for a 25cm cake tin, but the biggest I had and the biggest I could find in town was 20cm. This meant that it was quite difficult actually making sure the cake was cooked all the way through without drying out. Because the coca-cola makes the sponge so moist (and delicious), I think that really I needed a proper 25cm cake tin, or otherwise I should have used two smaller tins. What happened with my cake was that I kept checking it with skewers as the recipe recommended and they kept coming out gooey in the middle, so I had to keep putting it back in the oven to bake a little longer. The last thing I wanted to do was give people food poisoning!! Despite covering the top of the cake with tin foil as suggested to stop it overcooking, it still ended up being too dry on the top and outside of the cake. So I ended up having to cut off the dry bits of the cake, which unfortunately made it a bit untidy and crumbly when it came to decorating it later, and it also meant I ended up wasting food, which always annoys me. Suggestion
Seems obvious, but next time I'll bake it in the correct-sized tin (25cm) or two separate tins (perhaps 18cm each) and make sure I swap over the shelves half way through. You'll need to cook them for less time since each tin will have less cake in it so having consulted my Mary Berry Desserts book (something I probably should have done in the first place - doh!), 25 to 30 minutes should probably do it, but obviously keep checking with skewers.
11. Carefully remove the cake from its tin and set aside on a wire rack to cool.When it's cooled down properly, cut the sponge in half horizontally to make two thinner cake halves.
12. While the cakes are cooling you can start to make your white chocolate buttercream icing. Bring a small pan of water to boil, and then reduce to a simmer. Melt the white chocolate in a heatproof bowl over the pan of simmering water (the bowl should not come into direct contact with the boiling water).
13. In a separate clean bowl, cream together the butter, vanilla, and icing sugar until light and fluffy. Stir in the melted chocolate. Set aside until ready to use.
14. Place one half of the cake in the middle of a cake board. You'll be decorating the cake on this board so it's easier to construct it directly on the board rather than trying to transfer it over later. If you've got a rotating cake stand even better!
15. Spread the jam to about an inch of the edge over one of the cakes halves, then spread the whipped cream on top of the jam layer. If you spread it all the way to the edge it just makes a mess when you put the two halves together. Place the second cake on top to create a sponge sandwich. Sounds easy, right? Well, this is me, and I can make anything easy into a disaster when I put my mind to it. This is where we encountered Problèmenumérodeux...
Problem no. 2
You know that part of the recipe that said, leave the cake to cool? Yeah, well I'm impatient, and I was worried about running out of time, so I might have been a bit hasty to get started with the filling. The cake halves were still a bit warm, so when it came to adding the jam and cream filling it all just melted and the top half of the sponge started sliding off the bottom, and it just made a big gooey, sloppy, nightmare-ish mess! So after a lot of cursing, I scraped the cream and jam filling into the bin (putting my newly acquired palette knife to good use), put both cake halves in the fridge to attempt to cool them down quicker, and got down to whipping more cream for the filling. Very lucky that the cake itself was smaller following problem no.1, or I wouldn't have had enough cream! Suggestion
You don't save any time by being hasty. In fact you waste time and ingredients. Next time, let the damn cakes cool, until they are actually cool and not just lukewarm. Let this be a lesson to us all.
16. Once you've successfully constructed your cake, you can start icing it. But wait, what's this? I think I see what's coming...Problèmenumérotrois...
Problem no. 3
The once fluffy and light icing that had been patiently waiting on the side board had gone stiff again from the time wasted messing around with the filling, and attempting to ice with it was just pitiful. Imagine buying a stick of butter from the chilled section of the supermarket and attempting to butter bread right then and there. That's how unspreadable the icing was. Even attempting to soften it by beating it didn't seem to be having much of an effect. Suggestion
In the end I resorted to adding teeny tiny amounts of lukewarm water at a time to the icing and beating thoroughly again, and that seemed to loosen it up enough to make it spreadable. Phew!
17. Ok, now it's time to get icing. At this point I placed the cake board on top of a box of Celebrations to act as a cake stand, so I could rotate my cake while I was icing it. Following Dan Lepard's instruction video, I used the palette knife to generously add icing to the top of the cake. I didn't have a large ruler to scrape off the excess so I just used my cake scraper for that part.
18. Once the top bit is done, start coating the sides. Take a good dollop of buttercream and smooth it over the sides with the palette knife, carefully rotating the cake board/stand as you go. Once you've covered the sides all over with buttercream, hold the palette knife against the sides and rotate the cake so that you get a nice smooth even covering. Unfortunately my previous overcooking reared it's ugly head again.... Problèmenuméroquatre
Problem no. 4
This was a little bit tricky with my cake as it was still a little bit crumbly from when I'd had to cut off the dry bits from earlier on, and if you're not careful sometimes the icing can take off small chunks of the cake! Yikes! Suggestion
If I'd have been less panicky and thought of this at the time, I would have taken a few moments to brush down the top and sides of the cake to remove any crumbly bits before starting to ice the cake.
19. Once you've managed to get the first layer on the sides you can straighten them out by tucking in the scraper to the sides (so the sharp edge lines up against the vertical edge of the cake), hold it still and slowly rotate the cake around. Apart from adding the Smarties pattern this was probably my favourite bit! Scrape the excess icing into the bowl and keep going until you're happy with the coating.
20. You're supposed to then chill the cake and give it a second coating of icing (the first one is called the crumb coat, as it holds in all the crumbs), but I didn't have time for that so I just had to get on with the Smarties part. Plus I figured that with the Smarties entirely covering the cake no one would see if the icing was perfect underneath or not. Cunning. If I did this again though, I probably would try and give it two coats, as I'm sure it would make it better.
21. Right then, Smarties. This is the really fun part. I first separated out my Smarties into the different colours.
Look at all the pretty colours....
22. Then, having decided on what pattern I wanted, I set to sticking on the Smarties. This is what I was aiming for (below), but obviously I didn't know the exact dimensions of their cake to compare it to mine in order to get the same pattern so I kind of just had to ad lib. Also I didn't have any wire to add the springy bits on top, but that would have been cool!
Source: http://weheartit.com/entry/7825042
I started at the bottom and stuck on Smarties (they seemed to stick on the icing relatively well so I didn't need to use any marmalade or anything like that, but I knew the buttercream would eventually set if it took me too long so I had to work quickly), in the following order: Yellow, brown, green, blue, purple, pink, red, orange, and then repeat in the same order again until I'd completed one row along the bottom. I think because of the size of my cake it worked out so I had 5 and a bit sets of the different colours, and I suppose I could have left slight gaps in order to make it work out to be 5 exactly, but I wanted the Smarties as close together as possible to create the wave pattern in the original as best as I could.
23. Once I'd finished the bottom row, I just started the second row and angled the first yellow Smartie above and slightly to the right of the one below and carried on the same colour pattern all the way around. I carried on working my way around and upwards, until I started getting near the tops of the sides and then I started angling them back to the left to create the wave shape. That's when I realised we might have yet another problem....
Problem no. 5
In the original image it looks like the colours on opposite sides of the cake match up so that you can join them in the wave across the middle of the cake. But the way I'd done it, they weren't going to match up. This is because, if you look at the cake from one side then the order of the colours is actually going to be reversed on the opposite side, if that makes sense. I was able to line up one colour across the middle, but I was going to have to create more of a fan pattern with the other colours. For example with the brown smarties I laid them out in a line from the edge of the cake to approximately the middle point, and then carried on that line with orange smarties so that it matched up with the orange rows going down the sides on the opposite side of the cake. Then I did the reverse on the other side of the yellow line down the middle, and then carried on with the other colours, working my way out from the middle to the outer edges of the cake. Suggestion
What I did in the end didn't look half bad, and don't get me wrong, by the end of the day I was damn pleased with what I'd achieved, but the perfectionist in me always wants to improve things, so what I think might just work if I tried this another time is, instead of just repeating the order of colours one after another in that first row on the bottom edge of the cake is actually to start with the first colour set (yellow, brown, green, blue, purple, pink, red, orange) and then instead of starting at yellow again, you reverse the order so it now goes, red, pink, purple, blue, green, brown, then yellow, and keep going that way round. I'm not 100% sure it would work but it'd be worth a try at least. It all depends on the circumference and diametre of the cake really, and since my cake ended up being a bit smaller than 20cm diametre I have no idea how it would have ended up if I'd used the proper 25cm cake tin to start with.
When I eventually finished, this is what my cake looked like.
Ta Daaaa!!
I decided to use up the remaining Smarties by sticking them around the edge of the cake board with some left over icing, which looked pretty good, but made it a little difficult to carry form one place to another, so perhaps best to leave that unless you have a much bigger cake board than I did.
So there you have it, in one probably not very easy to follow recipe. If anyone does choose to take on this challenge let me know how it goes, or if you did / would do anything differently.