Hi everyone!
I just updated my cooking challenge page with a few new recipes ticked off the list - I've now completed 31 recipes so far with 41 to go. I've been going a bit Eastern crazy lately as I've done the Thai Green curry and more falafel (but baked this time which made me feel a lot better about the calorie content!) and I'm thinking of doing a chickpea and potato curry in the next week or so. Check out my Cooking Challenge page if you have a moment!
In other news, Tom's birthday has been and gone - we went to Silverstone to see the Free Practice for the MotoGP. Unfortunately we couldn't stay for the actual race on the Sunday as Tom had to work but we still had a brilliant time (despite the typical British weather that somehow left me drenched and sunburnt in equal measures) and we're already thinking about booking the whole weekend away next year.
Free Practice on the Friday at Silverstone
Because of our trip to Silverstone I thought Tom's birthday card should have a MotoGP theme to it, and after wracking my brains for days I finally came up with a design I really liked involving a hidden message - the design had checkered flags on the outside, and images of one of Tom's favourite MotoGP riders, Casey Stoner on the inside, and a hidden message in the folded part...
Checkered flags (which took ages...)
MotoGP winner 2012 Casey Stoner
Before he won the Championship last year Casey Stoner's rider number was 27 so I thought this would work well seeing as Tom turned 27 this year.
And now that Stoner is the reigning champion he is now riding under the number 1, so I thought I could play on this to write a cheesy message on the inside of the hidden part of the card.
It's small but the blue number on the bike is 1
I found the hidden message card tutorial on Youtube here (it takes a second or so for the video to start) and even though the original design on the video was quite feminine, the basics can be applied to any kind of card like the one I made.
In addition to the recipes on my Cooking Challenge list I also baked some toffee brownies as a late birthday treat for Tom. Absolutely, unbelievably, sinfully delicious, but so, so bad for you it doesn't bear thinking about (seriously, a whole stick of butter and 3 and a half bars of chocolate went into it!).
In other news, I'm going to be working at another Flower Show in London next week (Hampton Court) which also coincides with a family party to celebrate my cousin Jenny's end of treatment for breast cancer and her 40th birthday, so I'm really pleased I've managed to coordinate things so that I can work on the stand and do the family thing as well.
What else? Oh yes, we had Australian Christmas last weekend which was great fun - it's essentially a big get together for friends who we might not see on a regular basis and we have a bbq and just pretend like it's Christmas in Australia (but without the presents). There's been so much going on in the last month that it's been quite hard to stick to my budget so I'm hoping the next couple of weeks I can get by without spending much and slowly get more out of my overdraft. There's more birthdays coming up in July (including mine) so I'll still have to be careful about money for the time being.
And finally I got to see a specialist about the on and off dizziness I've been having, and he doesn't actually think I have labyrinthitis, which is good news in one sense as it means I won't be left with lasting damage to my inner ear. Unfortunately though he believes I'm been getting vestibular migraines which are what is affecting my balance, and which means I might need to be on medication for the rest of my life (boooo), and also means I have to completely cut out caffeine. Now I can cope without the stimulant side of caffeine as I don't drink much real caffeine these days anyway, but I just really like the taste of coffee and tea, so not sure how I'm going to cope without that. The bit that really upsets me though is.... *pause for dramatic effect*..... no more chocolate either!!
CURSES!!
He's definitely missing his Cadbury's Caramel
So that's my life in a nutshell for now. I'll try and update more as the weeks go by on everything (Cooking Challenge, decaffeinating myself, and getting out of my overdraft).
I know I haven't updated this in a while but I have been doing a fair bit of cooking lately (not always things from my Cooking Challenge list).
Ones I have managed to tick off the list are (I'll update the totals on the Cooking Challenge post):
Jamie Oliver's Chicken Korma which I made completely from scratch including the curry paste - ended up being a bit hotter than a normal korma (had to add loads of yoghurt to cool it down) but still very tasty. I did serve it with plain rice and naan bread but I couldn't get a decent picture of it sorry.
I didn't make those biscuits!
Rhubarb fool from Annie Bell's Gorgeous Desserts book which I made for my friend Helena's birthday yesterday - didn't look much like the picture as the lovely homegrown rhubarb from my friend Amy was more green than pink, and I used Courvoisier rather than Cointreau in the cream, but it still tasted really nice! I did make some poppy seed biscuits to go with it, but didn't manage to get a decent pic last night so here's one I put together today (with yummy French gallettes, I can't claim to have made those!). I've got a load of the fool leftover in the fridge now, so I'll most likely have some for lunch!
I also made a paella with roasted veg a couple of weeks ago - based on a recipe from Ravinder Bhogal's book Cook in Boots which again wasn't on the list, but tasted delicious. Surprisingly easy, although makes a real mess of the wok, and it's just as nice reheated as lunch for work. I'll definitely be trying that one again!
To continue my efforts to actually use the meat in our freezer, I tried my hand at slow cooking with a recipe for breast of lamb with baked onion, which I was pretty pleased with. The lamb was really tender, and the onions were delicious. I probably should have served it with potatoes, but didn't have any in, so made a ratatouille and added some plain pasta to the side.
Ratatouille with melted cheese
The leftover onions and ratatouille I added to grilled bread with melted cheese on top and that was delicious (and frugal!).
Baked onions with melted gloucs cheese and chives
Butterflied Toffee Cupcakes
As well as the Rhubarb Fool, I also attempted Toffee Cupcakes for Helena's party (again not on my list), which ended up being delicious even though we had to digress from the recipe slightly when the toffee cream I'd slaved over curdled (damn it!) while we were whipping it. The toffee sauce was amazing though!
Really glad I've learned how to make toffee sauce now - it'll be a good one on ice cream in the summer! Yum!
I love how this simple card turned out
As well as the baking I also decided to make a card for Helena's birthday since I'm trying to be good and get out of my overdraft by restricting my 'spending money' to just £10 a week. Given I didn't give myself enough time to properly plan anything, I'm super happy with how his turned out. I'll post separately about how I created it.
That's it for food updates for now - I'm making myself hungry thinking about it, so I better get something cooking!
It's the FINAL COUNTDOWN...da-da-daaa-daaaaa, da-da-da-daa-daaaaa...
Sorry about that.
It's officially 6 DAYS until Jemma and Steve's wedding and everything is slotting into place - Tom's suit arrived yesterday and it fits him great and he looks so handsome in it!! He really liked it as well, so I think that might be the suit of choice when it comes to be our turn, whenever that may be! (No pressure, of course). I'm so excited to see what everything looks like, the Portal Companion Cube cake, the game character name cards, the first dance.... ah it's all so exciting!
Things have been going well on the singing front too - we've settled on three songs we both like and that we believe are suitable for the church (it's only while they're signing the registers), and we can play and sing them quite happily. We've just submitted the lyrics for the vicar to give final approval but we've thought about it a lot and we're hoping he's ok with our proposed choices:
Grow old with you, by Adam Sandler (from the Wedding Singer)
In it for love, by Richie Sambora (guitarist from Bon Jovi) - the video's here if you're not familiar with it)
Don't wanna miss a thing, by Aerosmith
We've done them a couple of times in front of Tom's family and now they want us to play at his sister Jess's wedding next April, which is cool but we've come to an agreement that Becky has to sing with me, and Rob (Tom's brother and Becky's boyfriend) has to play guitar with Tom. That's a huge relief to me, as I'd forgotten how nerve-wracking it can be to sing in front of people you know, more so than strangers in my experience.
Unfortunately, timing is everything, and this last week I've come down with the symptoms of labyrinthitis again - grrr! So I'm back to being a dizzy mess but thankfully nausea is pretty minimal right now. It's the worst possible timing because I had a mega busy week at work with the launch of my first brochure of the year with the company (it looks so good!), as well as two days in London for various events, so I've had a combination of long days in the office, plus very early starts (of the 'up at 4am' variety) and very long days on the road to and from London, as well as staying up late with uni friends while I was there Friday night, none of which has really helped with the balance issues I've been having. Because it's been so busy at work, it's not been an option to take time off, but I'm hoping that now that all the major stuff is out of the way that I'll be able to chill a bit in the couple of days we have off before and after the wedding next weekend - wishful thinking I'm sure, but you've got to be positive!
I did speak to the chemist though as I'm not sure the drugs I'm taking are really helping the vertigo so I might need to go to the docs on Monday to get a new prescription or a referral to a specialist. The drugs I'm also taking are also the kind that you definitely cannot drink alcohol with so that's a bit of a bummer with the wedding only 6 days away, but I'd rather be sober and not fall over in Church, than have a horrible reaction to booze. Again, terrible timing.
The other complication is that we were planning on going to Alton Towers with friends after the wedding weekend, but I'm pretty sure mega fast rollercoasters won't help the dizziness so I might have to sit out the rides which will be really annoying if I have to miss that. Sometimes life is just not fair.
And of course, when you're feeling dizzy and unsteady on your feet, cooking with gas and sharp utensils isn't exactly the safest of activities so I've not been doing much from my cooking challenge list lately, although I did manage hot cross bun pudding (bread and butter pudding but better - try saying that quickly!) before I got properly messed up by the dizziness. That was definitely a success so I'll be making that again next year :) I'm trying to minimize how much time I'm spending on computers, reading, games or TV right now so I'm not going to type up the recipe for this I'm afraid, but you can find it in Annie Bell's Gorgeous Desserts (in the festive section I think). Only thing I did differently was I used regular caster sugar instead if golden, and I used 1.5 tsp of vanilla flavouring into the custard mixture instead of laying a vanilla pod on top of the pudding, just because I couldn't find any in any of the supermarkets I tried that day, but I don't think that would have made a big different to the taste really.
One word. Yum.
Anyway, I think I'm going to leave the update there for now so I can have a break from typing.
Hope everyone else is well and I'll try and update this more often once the dizziness has calmed down a bit.
Ta ta for now,
Last night I made pasta, chorizo and cannellini bean soup (click here for the full recipe), which was really really tasty, and today my friend Amy came over and we baked cardamom biscuits (another one from Ravinder Bhogal). I had tried to make the biscuits previously but since I didn't have gram flour (otherwise known as chickpea or besan flour) at the time, I wasn't sure if they'd turned out right or not so I didn't want to tick them off the list without giving them another go.
I did a bit of research and found out that Tesco's sold Gram Flour so while my car was in the garage getting MOT'd yesterday I popped to Tesco's to get some. Unfortunately I didn't check how big the bags were so when I eventually found it I was a bit shocked to see it only sold in huge 2kg bags - the recipe only needs 50g per batch (!), so I think I'm going to have to find some more recipes that use gram flour...oops!
Anyway, as there were two of us baking I thought we may as well make two batches, so that we could each have some to give to our respective partners, and also colleagues, although in my case that might depend on how hungry Tom is when he gets back from work...
The last time I tried this my main issue with the recipe was that the biscuit mix seemed to be very dry and crumbly, so it was quite difficult to get it to a point where it was all coming together to be able to knead it into a good dough, but I wasn't sure if maybe the lack of gram flour was to blame for this. I think in the end I added a bit more oil and an egg to try to get it to bind better and they turned out ok in the end. But I was interested to see whether using gram flour made any difference or not this time.
Anyway, preamble over, here's what I used and how I did it:
Ingredients (made approx 26 small biscuits)
120ml - 150 ml sunflower oil, plus extra to grease (original recipe used 100ml vegetable oil, but I found it was too floury and wasn't binding so added more)
200g plain flour
50g gram (chickpea) flour
75g icing sugar
1/2 tsp crushed cardamom seeds
14 pistachios, shelled and cut in half lengthways
Method (NB. Just because we split the tasks doesn't mean this recipe can't be done very easily on your own!)
1. We preheated the oven to 180c and I greased a couple of baking sheets with some of the sunflower oil and some greaseproof paper.
2. While I was doing this, Amy ground up the cardamom seeds in the pestle and mortar (that she got me for my birthday as it happens), and I shelled the pistachios. If you've not used cardamom before, it normally comes in a jar of pods, so you need to split them open with a sharp knife and remove the seeds (ideally separating them from the inner bit that they are attached to), and then just grind them in a pestle and mortar.
3. Then I sifted the dry ingredients into a mixing bowl and stirred them together with a whisk, while Amy halfed the pistachios for me.
4. Then we added 100ml of sunflower oil to the mix and Amy started mixing it with her hands. When we realised it just wasn't binding we added a little more oil and it seemed to do the trick. It was a lot easier to bring together, and then we could start kneading it into a firm dough as the recipe had told us to.
5. Once the dough was ready we took heaped teaspoons of the dough (my measuring spoons are like mini ice cream scoops so they were perfect for this!) and rolled the dough into a ball in our hands.
6. We then flattened each ball ever so slightly so it was still domed (the recipe said to flatten into a disc, but we made the first batch like this, and they didn't look right), and then pressed a pistachio half into the middle and popped it on the baking tray. I think the first batch we made yielded about 25 biscuits and the second one did about 27.
Second batch ready to go in the oven. I love the colour of pistachios.
7. Once we'd filled both the trays and used up all the mix we popped the trays into the oven. Now the recipe said to bake for 25 minutes until the biscuits are a nice golden brown. The first time we did this we set a timer to turn the trays around and swap the shelves after ten minutes, giving them twenty minutes in total, but I'm not sure if my oven is just a bit wonky, but the first batch definitely seemed a bit overdone and dry. So the second time, I set the timer for 7 minutes to swap them around, and then gave them another 7 minutes. After this point, i.e. 14 minutes, the larger tray of biscuits looked the right colour, but the smaller tray wasn't quite there so I gave them another couple of minutes in the hotter part of the oven. I think the key is to just keep checking them to make sure they don't overbake!!
8. When I took them out of the oven they were an even light golden brown colour, and cracked on top, and when I used the spatula to take them off the tray they seemed to be a tiny bit soft still, but they crumbled a little bit on the edges if we weren't careful, so I took that to mean they were done. NB. Don't try to use your fingers to transfer them to the cooling rack, as the biscuits will be flipping hot and you'll just end up burning yourself...trust me, I know.
9. I then left them to cool on a rack (I figured if they were a little soft in the middle that they'd set as they cooled).
Pretty, high contrast photo ;)
Having left them quite to cool while I typed up these two recipes, I've just tried one now, and they do taste better than the first batch (i.e.not overdone), however they are still a little bit too dry for my taste. I'd definitely need a cup of tea or something to go with them, but then I think I've always liked to have a drink with biscuits, so maybe it's just me!
I think if I tried them again I would maybe experiment with reducing the amount of flour slightly and adding a tiny bit more icing sugar and perhaps a bit more crushed cardamom, just to up the flavour a little bit. Don't get me wrong, they were nice and crumbly and had a gentle, subtle flavour, not too sickly sweet or overpoweringly aromatic, but I think personally, they could do with a tiny bit more sugar and just a wee bit more cardamom, but I suppose that's down to personal taste. Now I think about it, I'm sure I read somewhere that gram flour can come in a paste form so perhaps if I had gram flour in this format the mixture mightn't be quite so dry... hmmm, food for thought!
To round up, that takes the cooking challenge 2012 totals to:
8 recipes completed 64 recipes to go 46 weeks remaining
Anyway, I better get some other food in the oven now - Mum gave me some chicken, bacon and mushroom in the fridge to use in a stew / to roast so better get cracking!
Hi all,
sorry I've not updated on the Cooking Challenge in a little while, it's been a bit of a busy week at my new job, and I went up to Liverpool straight after work on Friday to see Reel Big Fish (it was awesome by the way!) so not had a chance to update on cooking progress until we got back a little while ago.
On Thursday I cooked Ravinder Bhoghal's Hanoi Poached Chicken with chilli dipping sauce, which was in the 'Skinny Food' chapter. As the recipe was originally for 6 people and therefore used 6 chicken fillets, I just used 2 fillets for the two of us and kept pretty much everything else the same. I think one of the reasons it might have been a 'healthier' meal is that the amount of rice it called for probably wouldn't have gone very far between 6 people, but as I cooked the recommended amount of rice for 6 we actually had plenty and a bit leftover for work the following day, which is always good by me :)
Now, I have to admit I was a little bit sceptical about how nice it would turn out, as in my experience healthier food tends to lack flavour, but fair play to the girl, this meal was absolutely Delicious(yes, with a capital D!)
The final dish with some of the chilli and garlic sauce on top
It's actually quite a simple recipe and not expensive either if you can get hold of relatively decent quality frozen chicken fillets which I can at Aldi's, although I may well get some from the Meat Man in town once we've cleared some space in the freezer as they've often got good deals on local meat. Basically the (defrosted) chicken is poached in chicken stock with some sliced ginger root and spring onions and then kept warm while you fry the rice with garlic and a small amount of oil and then cook it in the chicken stock. The chicken comes out beautifully tender and very flavoursome without having seen any oil or fat, but it's the rice that was the surprise winner for me.
I have never tasted such good rice before, and mixed in with a little of the chilli sauce (which was just a couple of chillis and some garlic whizzed in a food processor and then mixed with soy sauce, lime juice, a tsp of caster sugar, and some of the leftover stock) it was downright superb. For me, rice is normally one of two things - plain and dull but a handy (i.e. cheap) carb component of a meal, or it's tasty but expensive and unhealthy takeaway special fried rice with egg, shrimp and other bits of meat and veg. This rice on the other hand was simple, healthy, and beautifully flavoured. Even the cold leftovers at work the next day were mouthwatering.
I guess if someone were to take a very critical standpoint they could point out that rice cooked in chicken stock is going to have a fair bit of salt in it which is possibly not that healthy in the long run, but right now I'm personally more concerned about not eating overly fatty and sugary foods, so as in my opinion, it was a blooming good meal and definitely one I'll cook again I'm sure. The only thing to watch out for with this recipe is that if you are buying cheaper chicken fillets is that they're probably less likely to be of similar size or thickness so some of them might take longer to cook than the others.I suppose you could try to flatten some of the thicker fillets so that they're all roughly the same thickness but it's not really a big deal if you need to pop one back in the pot if it's not quite done in the middle.
All in all, it was a (surprisingly) fabulous recipe and definitely one I'll be cooking again for us and probably also for friends, but if anyone would like the recipe just let me know.
The other recipe I managed to tick off the list was the Oat and Hazelnut bites from the Rosie's Pantry book, which I also cooked on Thursday as I wanted to take them up to Liverpool with me to share out between the four of us who were going to the concert.
Now this one wasn't quite as healthy as the chicken dish, but to be fair it was pretty simple, and if it hadn't been for the fact that I was trying to cook the chicken at the same time it would have been easy peasy! The only thing I did wrong was forget to add the milk in at the right place, but I remembered eventually so no big deal. It just made the last stirring bit a bit more hard work, but certainly doesn't qualify as a 'Kitchen Disaster'.
The recipe I followed said it made about 30 cookies, but I managed to get quite a few more out of it, so I think next time I'll make each one a little bigger and see how we go. This was a perfectly nice, crunchy, cookie recipe and when they came out of the oven they were just a little bit soft in the middle which I thought was really yummy, although Tom said he thought they were even tastier cold.
Next time we might experiment and try to make a plate of half-baked cookie dough and see how it comes out.... I've just finished the last one now as I write and already I'm craving more! Oh dear...
Anyway, I'm starting to get really chilly typing this so I'm going to wrap this up so I can wrap myself up and get snuggled up on the sofa with a blanket and cup of tea.
The current Cooking Challenge 2012 recipe count is as follows:
Hi again,
as I mentioned in my previous post I have some cooking stuff I wanted to write about. Last week I was just enjoying browsing and drooling over a few of my recipe books, and I decided to make a list of a load of recipes I wanted to try. As the list grew and grew and grew, I realised that it might take me a while to get through all of them. In the end I came up with 72 recipes. There's nothing special about the number 72, I just found 72 I liked out of 5 cook books and I thought if I opened anymore books then the list would get ridiculously long.
So as a few of my friends have been doing resolution type things on their blogs, I thought it might be cool if I tried to cook all 72 recipes before the end of 2012 (kind of like the book 'Julia and Julia', although I don't flatter myself that my resulting blog will be half as interesting or witty). I worked out that that would be 1 and a half recipes on average a week, which might seem like quite a lot, but to be fair some of the recipes aren't long complicated recipes, they're just cooking stuff I want to try e.g. Jamie Oliver's Jam Jar Salad Dressings.
Since I haven't gotten round to writing about this until now, I've already completed some of the recipes (the ones I've highlighted), but I'll most likely be doing a few of them a couple of times anyway, so it's no big deal I don't think.
Below is the list of recipes I want to have completed by the end of the year (sorted by book) and here's the stats as they stand:
16. Hanoi poached chicken p. 202
17. Orecchiette with curly kale, lemon, and basil pesto p. 221
18. Butternut Squash, feta, seeds and greens salad p. 225
19. Crispy five spice duck breasts and pak choi p. 276
20. Fragrant chicken curry with star anise and lace pancakes p. 280
29. Lemon syllabub p. 89
30. Creme Caramel p. 90
31. Cranachan trifle p. 102
32. Petits Pots au Chocolat p. 113
33. Very chocolate-y Tiramisu p. 118
34. Salty caramel chocolate sponge p. 124 35. Big apple pie p. 130
36. Baked rhubarb sponge p. 142
37. Lemon surprise pudding p. 156
38. Hot Cross Bun pudding p. 184
Food Lovers: Cupcakes and Bakes
39. Redcurrant and Blueberry Muffins p. 46
40. Apple cakes p. 58
41. Berry cupcakes p. 64
42. Carrot muffins with walnuts p. 90
Jamie's Ministry of Food (Jamie Oliver)
43. Asian Chicken Noodle Broth p. 37
44. Macaroni cauliflower cheese bake p. 49
45. Chicken Chow Mein p. 60
46. Sweet and sour pork stir fry p. 65
47. Beef and black bean sauce p. 69
48. Chicken Korma p. 74
49. Lamb Rogan Josh p. 81
50. Chicken Tikka Masala p. 82
51. Thai Green Curry p. 91
52. Vegetable Bhajis p. 92
53. Jam Jar Dressings p. 102
54. Sweet potato and chorizo soup p. 131
55. Cauliflower cheese soup p. 136
56. Basic stew p. 180
57. Perfect roast chicken p. 196
58. Perfect Roast Lamb p. 200
59. Yorkshire Puddings p. 209
60. Baked creamy leeks p. 219 61. Baked French Potatoes p. 220
62. Crunchy Garlic Chicken p. 241
63. Parmesan chicken breast p. 242
64. Lamb chops and chunky salsa p. 244
65. Morroccan lamb and couscous p. 246 66. Griddled tuna and asparagus p. 261
67. Paella p. 292
68. Granola p. 316
69. Vanilla cheesecake p. 325
70. Fruit scones p. 331
71. Quick steamed microwave puddings p. 333
72. Cookies p. 336
I'll try to post pictures of everything as I cross it off the list (I guess the easiest thing is to just keep editing this post as I go along).
Right better get cracking - that crunchy garlic chicken won't make itself!
This was one of the more mammoth baking adventures I undertook last year, so I've needed to psych myself up to write it up. Although the eventual outcome looked and tasted great, the amount of stress it caused and problems I encountered means it belongs in part under the 'Kitchen Disasters' category. This is why you should never fudge recipes people - learn from my mistakes!!
I was cooking this to take to some friends in Droitwich who were holding a New Year's Eve Party which is a good hr and a half away so I needed to make sure the cake was ready to go pretty much as soon as Tom came home from work that evening, so I had some quite specific time constraints.
I think I started baking around 11:30 on New Year's Eve and I think it was just about finished around 6ish (I had the Jessie J album on repeat and I think I listened to it about 4 or 5 times...), but I did have to do a lot of research on the internet and asking people at my local cook shop before attempting this, including what icing would be best to use for sticking the smarties on, how to frost a cake properly, and even how to work out mathematically how many boxes of smarties I'd need to complete the design (I didn't actually work it out for my design, but I did find a cool/geeky website where someone else had done it).
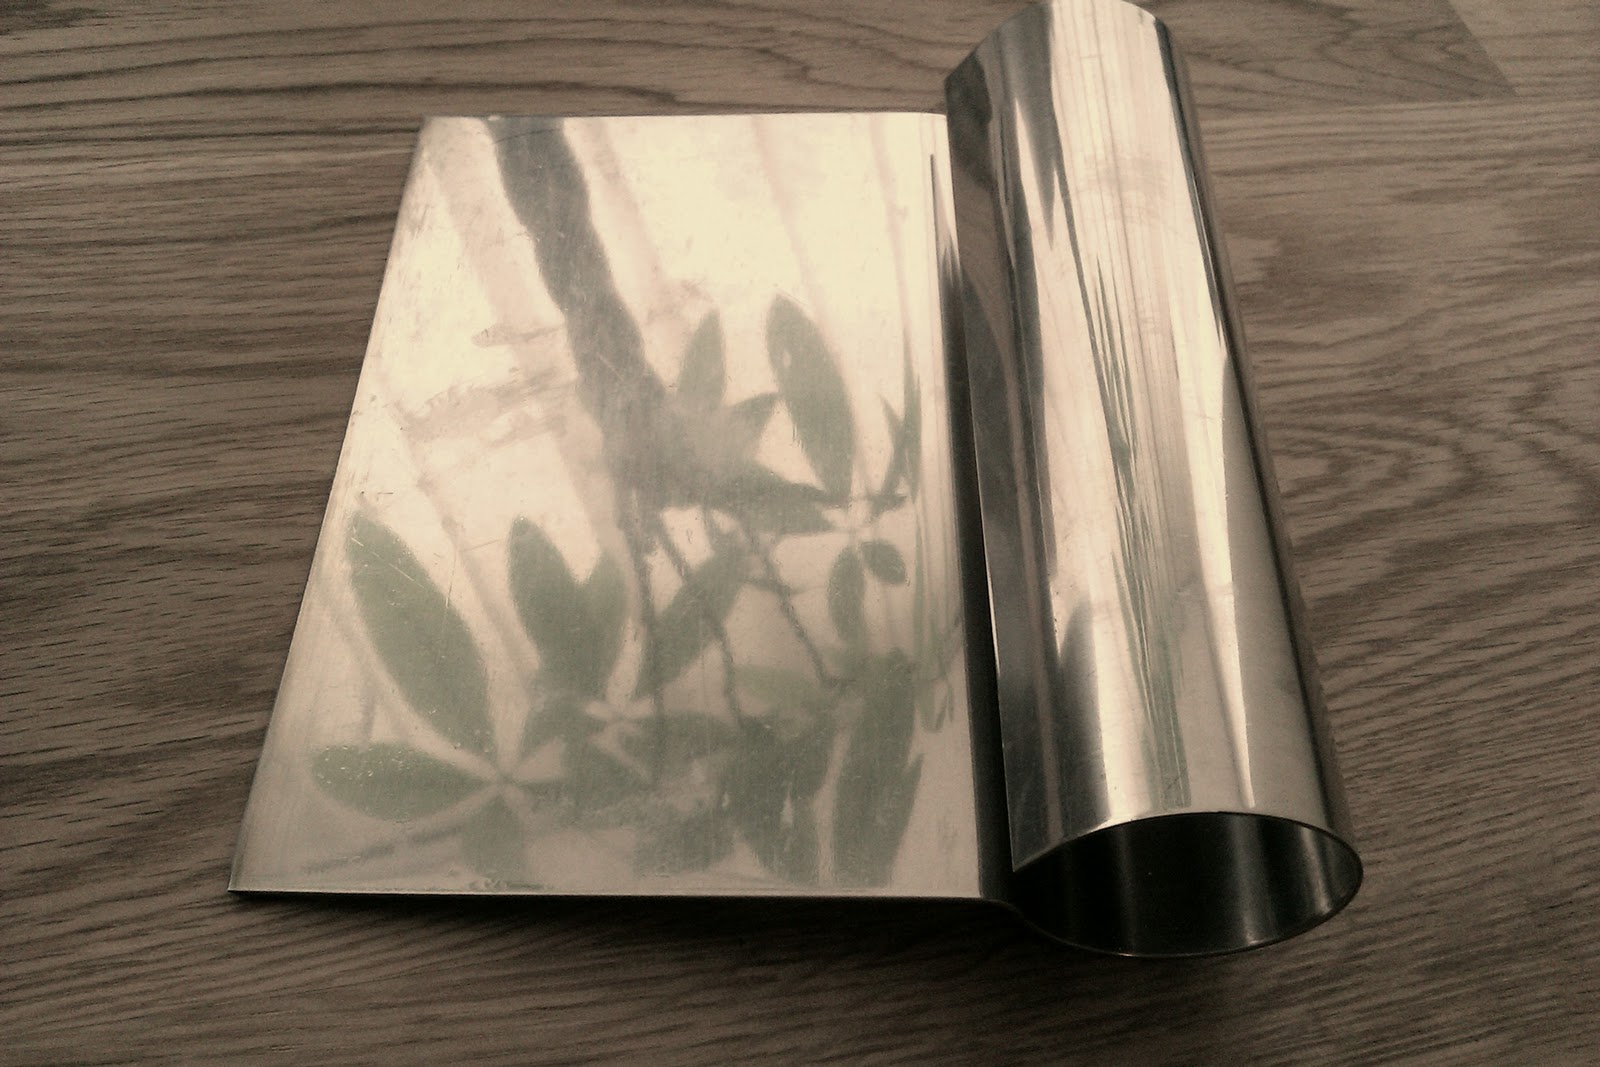
As I knew this one was going to take me a long time and that I'd need a fair bit of work surface, I decided to bring in our fold out metal table from the patio and one of the rather unstable chairs that go with it (this was before Tom got us our nice new dining table and chairs). Having researched the various different techniques required for the decorating part of the recipe I also had to go out and buy a palette knife and a cake scraper from the cook shop (again I can't believe how expensive this stuff can be). If you've not used/come across a cake scraper before, they look like this (featuring a reflection of my Pachira plant Roberto. And no, I don't think it's weird that I named my plant):
Why take a normal picture if you can take an arty-farty one?
Anyway, enough chit-chat, on to the recipe! The basis for the cake itself was the Hairy Bikers Chocolate Cake but I used rhubarb jam instead of strawberry, and I decorated it with White Chocolate Buttercream, the recipe for which came from another BBC Food recipe from The Great British Wedding Cake series.
I also followed a video tutorial from the BBC Food website to help with the icing technique as this has always been my downfall in the past: Icing a cake with buttercream (video) Ingredients: Chocolate sponge cake
250g butter, softened (plus extra for greasing)
400g golden caster sugar
3 tbsp sunflower oil
1 tbs vanilla extract
3 free-range eggs, beaten
400g plain flour
1 tsp bicarbonate of soda
2 tsp baking powder
1/2 tsp salt
pinch cinnamon
85g cocoa powder
220ml flat cola
150g strawberry jam (the stuff I used was more like a jelly, what you really need is something a bit runnier that will spread easily)
150ml double cream, whipped to stiff peaks
White Chocolate Buttercream
As I was only going to be decorating the one cake and not a whole wedding cake I adapted the ingredients for the buttercream to the following:
200g unsalted butter
1 tsp vanilla extract
500g icing sugar
100g white chocolate, melted
Decoration
Lots and lots and lots of Smarties. What I really wanted was a couple of those giant tubes you used to see at Christmas but I couldn't find them anywhere! Instead I had to buy about 25 of the smaller hexagonal cardboard tubes from Sainbury's and the Co-Op which ended up costing me a ridiculous amount of money. Curses...
Method
1. Preheat the oven to 170C/325F/Gas 3.
2. Grease a 25cm/10in cake tin (I only had a 20cm tin and couldn't find any bigger ones in town. See problem no.1 below) with butter and line with greaseproof paper.
A neat trick for lining round cake tins with greaseproof paper can be found here:
3. For the chocolate cake, in a large bowl, cream the butter and sugar together until the mixture is pale and light.
4. In a separate bowl, stir the sunflower oil and vanilla extract into the beaten eggs.
5. Gradually beat the egg mixture into the butter and sugar mixture, adding just a little egg mixture at a time and making sure it is well incorporated before adding more, until all of the egg mixture has been incorporated and the mixture is well combined. If the mixture looks like it's starting to curdle with the addition of the egg mixture then you can add a bit of flour to prevent this.
6. In a separate bowl, mix together the flour, bicarbonate of soda, baking powder, salt, cinnamon and cocoa powder until well combined. Mmmm, cocoa and cinnamon... :)
7. Gradually fold the flour mixture into to the cake batter mixture, a spoonful at a time, until all of the flour mixture has been incorporated into the cake batter. This might take a while as there are quite a lot of dry ingredients, but go slowly and your cake will be better for it!
8. Gradually add the flat cola to the cake batter and stir carefully until well combined. I definitely find it goes in better if you add it bit by bit, as with the egg mixture.
NB: If you only have fizzy coke, you can make it flat either by shaking it up inside the bottle and carefully opening the lid just a crack to let the gas escape (you might want to do this over a sink if you don't want coke all over yourself and the kitchen!). Or you can pour out the amount of coke you need into a measuring jug, add a small teaspoon of sugar, and stir. This will make the coke fizz up and release loads of the gas. Taste, and if it's flat enough then great, but if not, add a tiny bit more sugar and stir again to release the left over gas. This will make the coca cola (and therefore your cake mixture) a bit sweeter, but it's a lot less messy than shaking up the bottle!
9. Pour the cake batter into the greased, lined cake tin. Level the top of the cake out with a palette knife or spatula.
10. Transfer the cake to the oven and bake for 1hr 15 mins to 1hr 20 mins, checking regularly, or until the cake has risen and a skewer comes out clean when inserted into the centre of the cake. (If the top of the cake browns too quickly during cooking, cover it with a sheet of aluminium foil.). This is where we encountered
Problèmenuméro un....
Problem no.1
One of the first problems I encountered was, once again, down to incorrect equipment. The original recipe called for a 25cm cake tin, but the biggest I had and the biggest I could find in town was 20cm. This meant that it was quite difficult actually making sure the cake was cooked all the way through without drying out. Because the coca-cola makes the sponge so moist (and delicious), I think that really I needed a proper 25cm cake tin, or otherwise I should have used two smaller tins. What happened with my cake was that I kept checking it with skewers as the recipe recommended and they kept coming out gooey in the middle, so I had to keep putting it back in the oven to bake a little longer. The last thing I wanted to do was give people food poisoning!! Despite covering the top of the cake with tin foil as suggested to stop it overcooking, it still ended up being too dry on the top and outside of the cake. So I ended up having to cut off the dry bits of the cake, which unfortunately made it a bit untidy and crumbly when it came to decorating it later, and it also meant I ended up wasting food, which always annoys me. Suggestion
Seems obvious, but next time I'll bake it in the correct-sized tin (25cm) or two separate tins (perhaps 18cm each) and make sure I swap over the shelves half way through. You'll need to cook them for less time since each tin will have less cake in it so having consulted my Mary Berry Desserts book (something I probably should have done in the first place - doh!), 25 to 30 minutes should probably do it, but obviously keep checking with skewers.
11. Carefully remove the cake from its tin and set aside on a wire rack to cool.When it's cooled down properly, cut the sponge in half horizontally to make two thinner cake halves.
12. While the cakes are cooling you can start to make your white chocolate buttercream icing. Bring a small pan of water to boil, and then reduce to a simmer. Melt the white chocolate in a heatproof bowl over the pan of simmering water (the bowl should not come into direct contact with the boiling water).
13. In a separate clean bowl, cream together the butter, vanilla, and icing sugar until light and fluffy. Stir in the melted chocolate. Set aside until ready to use.
14. Place one half of the cake in the middle of a cake board. You'll be decorating the cake on this board so it's easier to construct it directly on the board rather than trying to transfer it over later. If you've got a rotating cake stand even better!
15. Spread the jam to about an inch of the edge over one of the cakes halves, then spread the whipped cream on top of the jam layer. If you spread it all the way to the edge it just makes a mess when you put the two halves together. Place the second cake on top to create a sponge sandwich. Sounds easy, right? Well, this is me, and I can make anything easy into a disaster when I put my mind to it. This is where we encountered Problèmenumérodeux...
Problem no. 2
You know that part of the recipe that said, leave the cake to cool? Yeah, well I'm impatient, and I was worried about running out of time, so I might have been a bit hasty to get started with the filling. The cake halves were still a bit warm, so when it came to adding the jam and cream filling it all just melted and the top half of the sponge started sliding off the bottom, and it just made a big gooey, sloppy, nightmare-ish mess! So after a lot of cursing, I scraped the cream and jam filling into the bin (putting my newly acquired palette knife to good use), put both cake halves in the fridge to attempt to cool them down quicker, and got down to whipping more cream for the filling. Very lucky that the cake itself was smaller following problem no.1, or I wouldn't have had enough cream! Suggestion
You don't save any time by being hasty. In fact you waste time and ingredients. Next time, let the damn cakes cool, until they are actually cool and not just lukewarm. Let this be a lesson to us all.
16. Once you've successfully constructed your cake, you can start icing it. But wait, what's this? I think I see what's coming...Problèmenumérotrois...
Problem no. 3
The once fluffy and light icing that had been patiently waiting on the side board had gone stiff again from the time wasted messing around with the filling, and attempting to ice with it was just pitiful. Imagine buying a stick of butter from the chilled section of the supermarket and attempting to butter bread right then and there. That's how unspreadable the icing was. Even attempting to soften it by beating it didn't seem to be having much of an effect. Suggestion
In the end I resorted to adding teeny tiny amounts of lukewarm water at a time to the icing and beating thoroughly again, and that seemed to loosen it up enough to make it spreadable. Phew!
17. Ok, now it's time to get icing. At this point I placed the cake board on top of a box of Celebrations to act as a cake stand, so I could rotate my cake while I was icing it. Following Dan Lepard's instruction video, I used the palette knife to generously add icing to the top of the cake. I didn't have a large ruler to scrape off the excess so I just used my cake scraper for that part.
18. Once the top bit is done, start coating the sides. Take a good dollop of buttercream and smooth it over the sides with the palette knife, carefully rotating the cake board/stand as you go. Once you've covered the sides all over with buttercream, hold the palette knife against the sides and rotate the cake so that you get a nice smooth even covering. Unfortunately my previous overcooking reared it's ugly head again.... Problèmenuméroquatre
Problem no. 4
This was a little bit tricky with my cake as it was still a little bit crumbly from when I'd had to cut off the dry bits from earlier on, and if you're not careful sometimes the icing can take off small chunks of the cake! Yikes! Suggestion
If I'd have been less panicky and thought of this at the time, I would have taken a few moments to brush down the top and sides of the cake to remove any crumbly bits before starting to ice the cake.
19. Once you've managed to get the first layer on the sides you can straighten them out by tucking in the scraper to the sides (so the sharp edge lines up against the vertical edge of the cake), hold it still and slowly rotate the cake around. Apart from adding the Smarties pattern this was probably my favourite bit! Scrape the excess icing into the bowl and keep going until you're happy with the coating.
20. You're supposed to then chill the cake and give it a second coating of icing (the first one is called the crumb coat, as it holds in all the crumbs), but I didn't have time for that so I just had to get on with the Smarties part. Plus I figured that with the Smarties entirely covering the cake no one would see if the icing was perfect underneath or not. Cunning. If I did this again though, I probably would try and give it two coats, as I'm sure it would make it better.
21. Right then, Smarties. This is the really fun part. I first separated out my Smarties into the different colours.
Look at all the pretty colours....
22. Then, having decided on what pattern I wanted, I set to sticking on the Smarties. This is what I was aiming for (below), but obviously I didn't know the exact dimensions of their cake to compare it to mine in order to get the same pattern so I kind of just had to ad lib. Also I didn't have any wire to add the springy bits on top, but that would have been cool!
Source: http://weheartit.com/entry/7825042
I started at the bottom and stuck on Smarties (they seemed to stick on the icing relatively well so I didn't need to use any marmalade or anything like that, but I knew the buttercream would eventually set if it took me too long so I had to work quickly), in the following order: Yellow, brown, green, blue, purple, pink, red, orange, and then repeat in the same order again until I'd completed one row along the bottom. I think because of the size of my cake it worked out so I had 5 and a bit sets of the different colours, and I suppose I could have left slight gaps in order to make it work out to be 5 exactly, but I wanted the Smarties as close together as possible to create the wave pattern in the original as best as I could.
23. Once I'd finished the bottom row, I just started the second row and angled the first yellow Smartie above and slightly to the right of the one below and carried on the same colour pattern all the way around. I carried on working my way around and upwards, until I started getting near the tops of the sides and then I started angling them back to the left to create the wave shape. That's when I realised we might have yet another problem....
Problem no. 5
In the original image it looks like the colours on opposite sides of the cake match up so that you can join them in the wave across the middle of the cake. But the way I'd done it, they weren't going to match up. This is because, if you look at the cake from one side then the order of the colours is actually going to be reversed on the opposite side, if that makes sense. I was able to line up one colour across the middle, but I was going to have to create more of a fan pattern with the other colours. For example with the brown smarties I laid them out in a line from the edge of the cake to approximately the middle point, and then carried on that line with orange smarties so that it matched up with the orange rows going down the sides on the opposite side of the cake. Then I did the reverse on the other side of the yellow line down the middle, and then carried on with the other colours, working my way out from the middle to the outer edges of the cake. Suggestion
What I did in the end didn't look half bad, and don't get me wrong, by the end of the day I was damn pleased with what I'd achieved, but the perfectionist in me always wants to improve things, so what I think might just work if I tried this another time is, instead of just repeating the order of colours one after another in that first row on the bottom edge of the cake is actually to start with the first colour set (yellow, brown, green, blue, purple, pink, red, orange) and then instead of starting at yellow again, you reverse the order so it now goes, red, pink, purple, blue, green, brown, then yellow, and keep going that way round. I'm not 100% sure it would work but it'd be worth a try at least. It all depends on the circumference and diametre of the cake really, and since my cake ended up being a bit smaller than 20cm diametre I have no idea how it would have ended up if I'd used the proper 25cm cake tin to start with.
When I eventually finished, this is what my cake looked like.
Ta Daaaa!!
I decided to use up the remaining Smarties by sticking them around the edge of the cake board with some left over icing, which looked pretty good, but made it a little difficult to carry form one place to another, so perhaps best to leave that unless you have a much bigger cake board than I did.
So there you have it, in one probably not very easy to follow recipe. If anyone does choose to take on this challenge let me know how it goes, or if you did / would do anything differently.